

Tuesday, December 11, 2018
Friday, October 26, 2018
DIY Wizard Wands

For Halloween this year we are going as wizards from the Harry Potter universe, so of course we needed to create some wands! There are many descriptions online of using hot glue, dowels, and acrylic paint to make your own wands, and that's exactly what we did too. I was surprised at how well it worked, and how nicely the glue took paint. The glue works particularly well for organic shapes and patterns.

Supplies:
12 inch wooden dowels (from a craft store)
Sandpaper
Hot glue gun and many extra sticks of glue
Cheap acrylic kids paint
Glossy polyurethane
Steps:
The first step for me was sanding down one side of the dowel which would be the 'tip' of the wand.

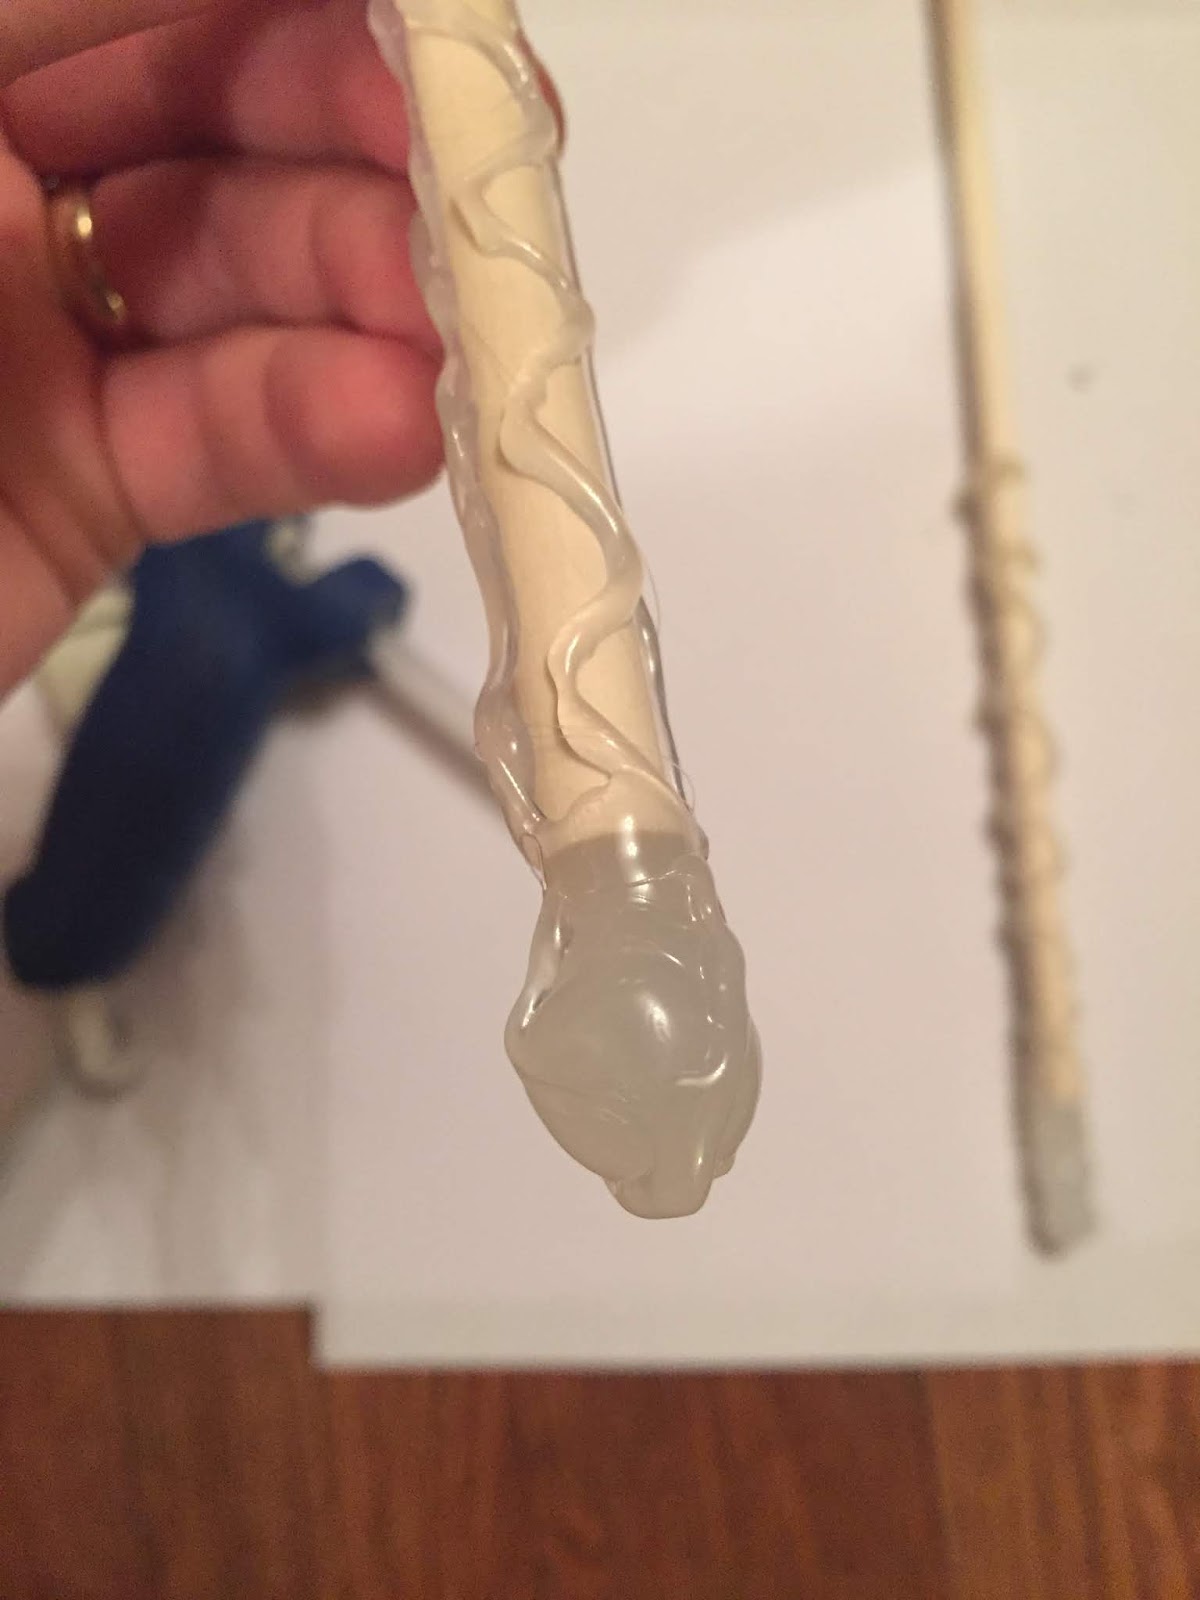
Next I added the hot glue. I first made a sort of 'handle' for each wand where the thumb and forefinger will rest.

Next I embellished the rest of the grip.

Last I added a 'butt' to the wand to increase the overall length of the grip. This is essentially just a giant glob of hot glue. I added extra glue over the glob to make it more interesting. This also served to add extra weight behind the 'handle' and make the handle the balance point of the wand.

I stopped adding glue to the end once the balance was right.

I used a black base coat, then successive layers of brown, from dark to light. Each coat was thinner than the last, so that the deeper crevices remained darkest. The final lightest brown I only painted onto the glue embellishment, and did two coats to increase the brightness.


Sunday, July 15, 2018
DIY: Cornhole set (bean bag toss) boards and bags

This is my attempt to make a cornhole set using these instructions:
https://www.diynetwork.com/how-to/outdoors/structures/how-to-build-a-regulation-cornhole-set
I did pretty much this entire project in my apartment using a hand saw, a jigsaw, and a cordless power drill. If you have an actual workshop and clamps and benches etc this would be a lot easier, but if you have a tiny amount of space and a few power tools you can still make it work!

Materials:
I used 2 pre-cut 24x48 inch sheets of plywood for the faces of my boards. For the edges and legs I used 3 inch wide, 3/4 inch thick board because it was cheaper than actual 2x4s. and seemed easier to cut given my limited supplies.
I needed enough edging board to line two 24x48 inch rectangles along with legs. This meant 4 pieces 48 inches long, and 4 pieces 22.5 inches long (24 inches wide minus two 3/4 inch wide boards). Plus 4 legs 11.5 inches long.

I additionally bought a whole pile of indoor/outdoor use screws and four pairs of nuts and bolts to attach the legs to the frames.
For the bags we used two different colors of a thick indoor/outdoor fabric (you are technically supposed to use duck cloth, but we asked the fabric store people what would be an acceptable substitute and they pointed us toward the 'denim and related' fabric section; we found a fabric we liked that came in two different colors). We used a sewing machine and filled the bags with dry Navy Beans.
Building:

Frames: First I cut the boards to make the edge frame. Again, building a rectangle that sits under a 48x24 inch rectangle, I cut two pieces 48 inches long and 2 pieces 22.5 inches long per frame. These were all drilled together with two screws per joint. Remember to pre-drill your holes! If you own clamps, use them! I do not, so I used my hands, which is dangerous and not recommended. Also you probably should be doing all this in a well ventilated room because there is lots of sawdust which is probably bad for you to breathe.


With the rectangles complete, I next attached the plywood tops. Remember when you are drilling down into the edge frame that there are screws already inside of it! If the frame doesn't seem to be lining up perfectly with the plywood board, you may be able to flex your frame a little to make it line up. The boards I used were a little warped, but pliable enough to put back into position.


I used the power drill to drill a hole within the circle wide enough to fit the jigsaw, then used the jigsaw to cut out the circle. This was actually my first time using the jigsaw, so the circles are Not Great, but they were good enough for me.

At this point I spent awhile sanding down the boards and particularly the holes to help hide my lack of carpentry skills.
Legs:
The legs start as 11.5 inch long pieces. Mark the board 1 3/4 inches from the top on the center line. Draw a circle using that point as the center with a 1 3/4 inch radius. Cut this with a jigsaw to make a curved top to your leg.


Flip your board upside down. Place the curved top of your leg into the corner of your frame, so that the leg points upward, and is flush against the long-edge of the frame. You want to drill a hole through the frame and the leg that is at the midline for the edge height-wise, and the midline of your leg depth-wise. Place bolt through the hole, and see how well your leg rotates.


If you are really bad at using a jigsaw like I am, your leg will not move well. Make the curve of the leg steeper by removing more wood until it actually rotates in and out when attached to the board.

Final unpainted product:


Painting:
I painted mine a very simple black edge with white top. I'm planning on re-painting them each year for different parties/gatherings, and wanted a simple base. The boards absorbed far more paint than I expected, and they probably need a few more coats of paint than I had time to give them.

Bags:
Officially these bags should be 6 inches square, but we made them a bit smaller by cutting 6 inch squares of fabric so that once sewn they are closer to 5 inches square.
You will need 4 bags of each color, so 8 squares of each color fabric.


These are a very simple sewing project if you have a sewing machine: Pin the two sides together, sew the edges, and leave a 1 1/2 inch gap on one side. Use this gap to invert the bags (so the sewn edge is now inside) and fill the bags with navy beans. We hand-stitched the first few closed, then realized we could actually still use the sewing machine to close them because we hadn't filled them too full with beans.


And there you have it! Boards and bags!

Much to my own surprise the boards and bags held up great for our party and will be in fine shape for the next event!
Tuesday, February 27, 2018
DIY Coffee Harvesting and Roasting
First things first; a coffee tree in a pot in your apartment takes about 3-4 years of growing before it will start to produce fruit, and maybe a couple more before it makes enough fruit that you can convince yourself you should try harvesting them.
Your future coffee beans first appear as little white flowers, harbingers of caffeine and happiness.


About a month later you will see little green fruit start to emerge where the flowers had been. Now comes the hardest part; it takes up to 6 months for those green fruit to ripen into juicy red berries.

Six. Months. It's agonizing.
But if you are patient, 6 months later, you can harvest to fully ripened berries. They should be a strong, deep red when you harvest them; if in doubt err on the side of waiting a little longer.

So now that we've picked the berries, we can start making the coffee.

First, open the berries. A large, ripe berry will have two coffee beans inside. Smaller berries may just have one. The beans will be nice and slimey when first removed.

Next, wash the beans, then set them in a dish of water to ferment. I've found this process takes about 3-4 days. The beans should start to feel a bit gritty at the end of fermentation. At this point you should throw out any floating beans.

Now we dry the beans. Outside people use the sun. Inside an apartment, a desk lamp might be your best bet. I used a lamp with a compact fluorescent bulb, so it produced fairly minimal heat, but just enough to speed up drying times. Even under the lamp it still takes about 7 days. To find out if they are dry enough, take one bean and open it up, revealing the green inner bean. A sufficiently dry bean will snap in your mouth; if it is chewy then you need to keep drying.


Now that your beans are dry, shell them all, then remove the silvery parchment.

What is left is the actual coffee bean that you consume. They should be a greenish silver color.


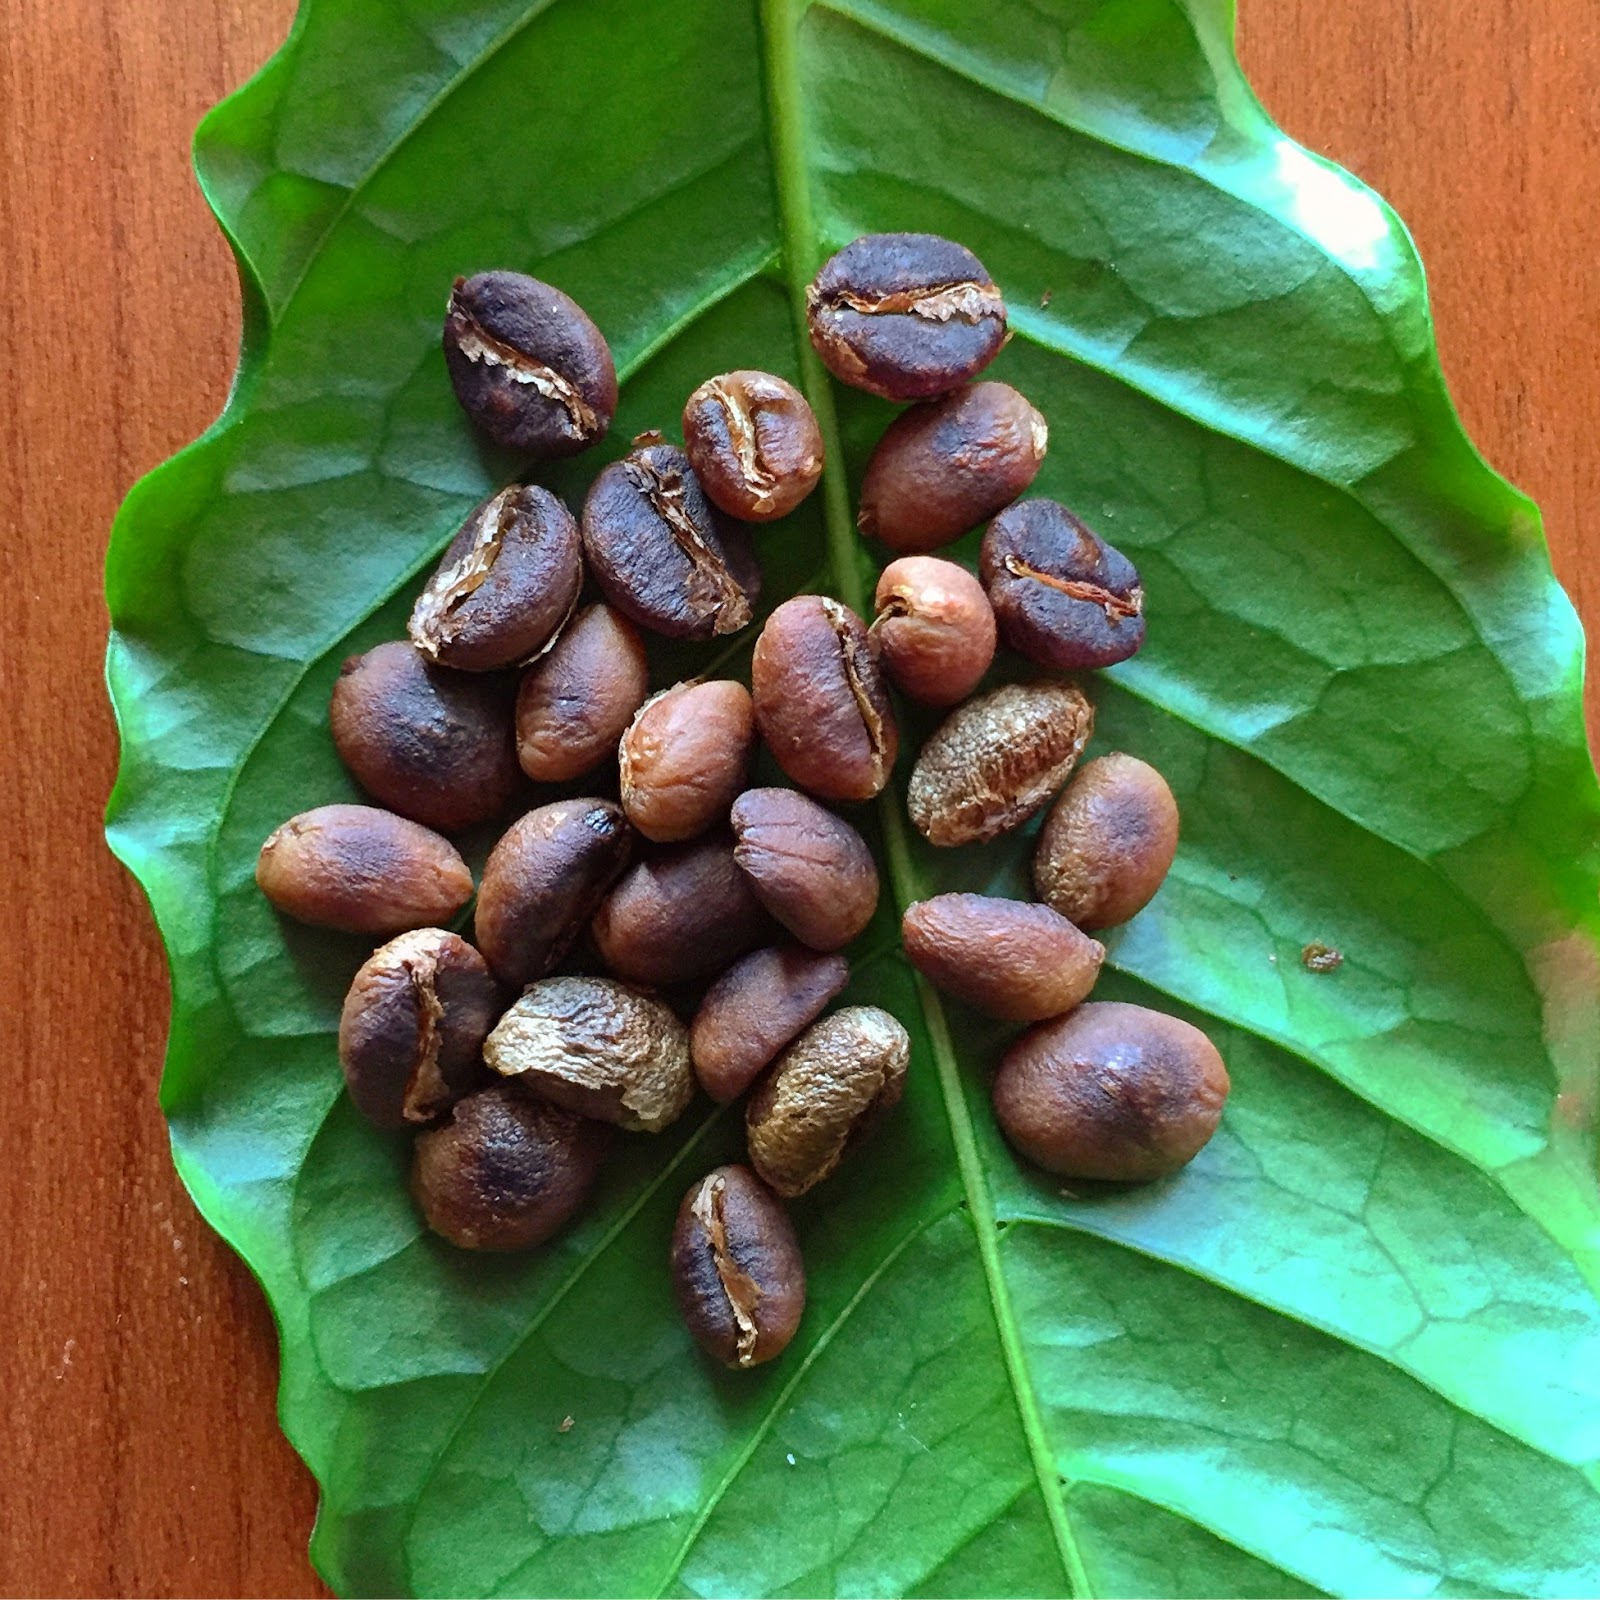
Finally it is time to roast the beans. There are many great descriptions of using air-poppers (like for popcorn) to do this well in your house. I did no such thing. The hardest option is to use a frying pan on a stove. This is extra hard if you don't have enough beans to fill the pan, so you cannot stir them well. This was my situation. Again, I do not recommend this method, but it is technically possible. Set the stove to a medium heat and start roasting. It should take about 15-20 minutes if done right. The first time I did this I set the stove to high and immediately burned my beans. You are trying to heat them up, then caramelize the sugar inside. Once the sugar is all caramelized you are done, and any further cooking will burn it. Alternatively, if the pan is too hot they will burn immediately.


This was my final product. You can see how beautifully uneven I was able to roast the beans in a fry pan. Definitely worth the wait!

Subscribe to:
Posts (Atom)